Hands-On Guide: Building Efficient APIs with Node.js - Part 3
To know more about the technologies used in API development. Final part of a three part series.
In our previous article, we delved into database integration, testing with Postman and the essential considerations when building a robust API. For comprehensive understanding, I recommend Hands-On Guide: Building Efficient APIs with Node.js - Part 1 before proceeding with this article. However, if you're primarily interested in deployment, feel free to skip the preceding sections.
Authenticate with JSON Web Tokens (JWT)

Why do we need authentication?
REST APIs operate in a stateless manner, meaning they don't establish sessions upon login.
Consequently, anyone could potentially access our data. To counter this, user authentication is imperative.
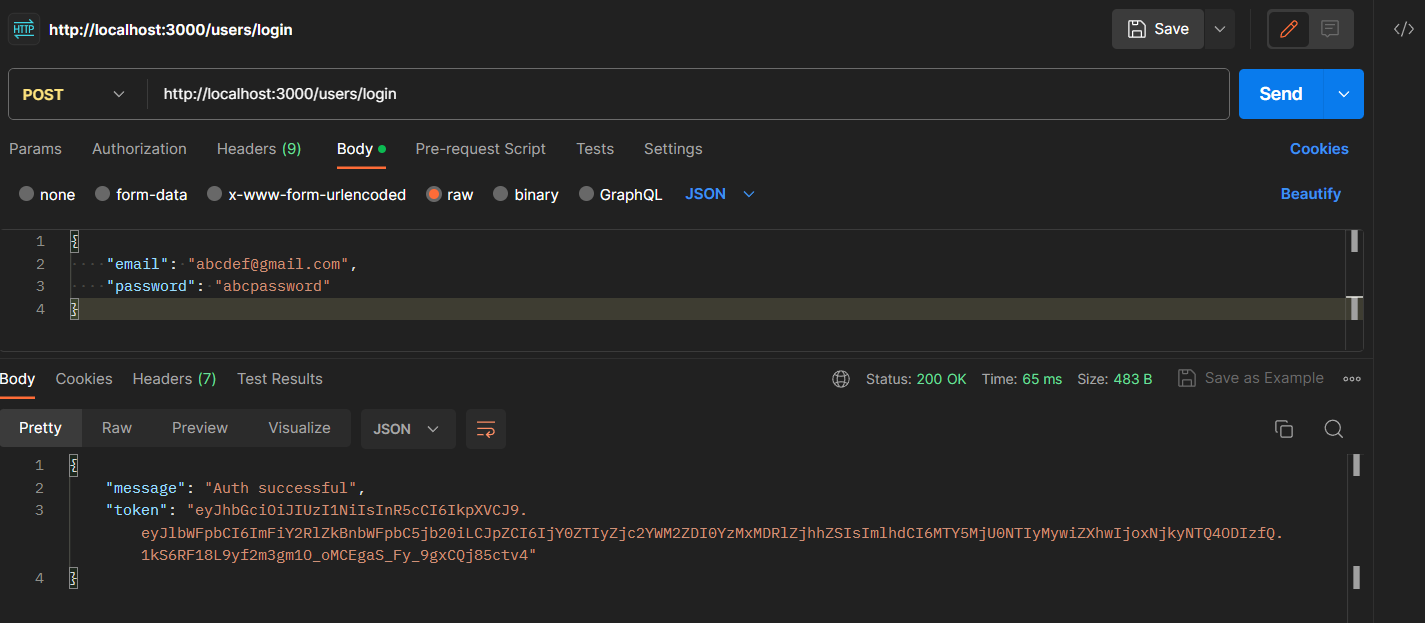
Upon a user's login, a token is generated, which has a finite validity period. Subsequent API requests are authenticated using this token.
JWT Integration
Installing jsonwebtoken Package
Start by installing the jsonwebtoken package using the command
npm install jsonwebtoken --save
Setting up environment variable
- Create an environment variable ‘JWT_KEY’. This can be done via the ‘nodemon.json’ file or dotenv package or by setting up the variable in your terminal.
Generating token upon login
First, we’ll see if the given email id exists. If not, return a “404 Not Found” error.
If email id exists, compare the passwords. If passwords don’t match, return a “401 Auth Failed” error.
If passwords match, sign an object containing the user's email and ‘_id’. This token is essential for subsequent requests.
Note: It is recommended to hash and compare passwords using the bcrypt package for enhanced security.
 const jwt = require('jsonwebtoken');
 router.post('/login', (req, res) => {
     // Extract email and password from the request body
     const email = req.body.email;
     const password = req.body.password;

     // Search for users with the given email in the database
     Users.find({ email: email }).exec()
         .then(docs => {
             // If no users are found with the given email
             if (docs.length === 0) {
                 res.status(404).json({
                     error: 'User Not Found'
                 });
             } else {
                 // If a user is found with the given email, check the password
                 if (docs[0].password === password) {
                     // Generate a JWT token with user's email and ID
                     const token = jwt.sign({
                         email: docs[0].email,
                         id: docs[0]._id
                     },
                     // Use the JWT_KEY stored in environment variables
                     process.env.JWT_KEY,
                     {
                         expiresIn: "1h" // Token expiration time: 1 hour
                     });

                     // Respond with success status and the generated token
                     res.status(200).json({
                         message: 'Auth successful',
                         token: token
                     });
                 }
                 else {
                     // If password doesn't match, respond with unauthorized status
                     res.status(401).json({
                         message: 'Auth failed'
                     });
                 }
             }
         })
         .catch(err => {
             // If an error occurs during the database query, respond with server error status
             res.status(500).json({
                 error: err
             });
         });
 });
Authenticate using jwt
Upon making a login request, copy the response token and decode it using tools like jwt.io or DevToys.
api/middlware/authenticate.js
 const jwt = require("jsonwebtoken");

 // Middleware function to handle JWT authentication
 module.exports = (req, res, next) => {
     try {
         // Extract the token from the "Authorization" header
         const token = req.headers.authorization.split(" ")[1]; // Assuming the header format is "Bearer token"
         console.log(token);

         // Verify the token using the JWT secret key stored in the environment variable
         const decoded = jwt.verify(token, process.env.JWT_KEY);

         // Attach the decoded user data to the request object for further use
         req.userData = decoded;

         // Call the next middleware or route handler
         next();
     } catch (err) {
         // If token verification fails, return a 401 Unauthorized response
         res.status(401).json({
             message: 'Auth failed'
         });
     }
 };
Adding Middleware for authentication
This function can be imported and used as middleware in our routes. The ‘authenticate’ middleware is executed before executing the route functions.
Similarly, ‘authenticate’ middleware can be used in all routes except for those that generate tokens (i.e., login and signup routes).
 const authenticate = require('../middleware/authenticate');

 // Define a route that requires authentication using the 'authenticate' middleware
 router.get('/', authenticate, (req, res) => {
     // Query the Users collection to retrieve user data
     Users.find()
         .select('_id name email password') // Select specific fields to return
         .exec()
         .then(users => {
             // Construct a response containing user data and additional metadata
             res.status(200).json({
                 users: users.map(user => ({
                     _id: user._id,
                     name: user.name,
                     email: user.email,
                     // Note: Sending password in the response is not recommended for security reasons
                     password: user.password,
                     request: {
                         type: 'GET',
                         url: 'http://localhost:3000/users/' + user._id
                     }
                 }))
             });
         })
         .catch(err => {
             // Handle errors by sending a 500 Internal Server Error response
             res.status(500).json({
                 error: err
             });
         });
 });
Authorizing User Access
For deleting a user or patching a user, an additional layer of security can be added by comparing the decoded token's email with the email associated with the passed
_id. Consider the following example:
router.delete('/:id', authenticate, (req, res) => {
    // Find the user by their ID
    Users.findById(req.params.id).exec()
        .then(user => {
            console.log(req.userData);
            // Check if the authenticated user's email matches the user's email
            if (user.email !== req.userData.email) {
                // If authentication fails, send a 401 Unauthorized response
                res.status(401).json({
                    message: 'Auth failed'
                });
            } else {
                // If authentication passes, delete the user by their ID
                Users.findByIdAndDelete(req.params.id).exec()
                    .then(deletedUser => {
                        // Send a success response with the deleted user's data
                        res.status(200).json({
                            message: 'User deleted successfully!',
                            user: deletedUser
                        });
                    })
                    .catch(err => {
                        // Handle errors during deletion and send a 500 Internal Server Error response
                        res.status(500).json({
                            error: err
                        });
                    });
            }
        })
        .catch(err => {
            // Handle errors during user retrieval and send a 500 Internal Server Error response
            res.status(500).json({
                error: err
            });
        });
});
Testing with Postman
Install Postman if you haven’t already or use the Web version.
- Login with your credentials and copy the token.

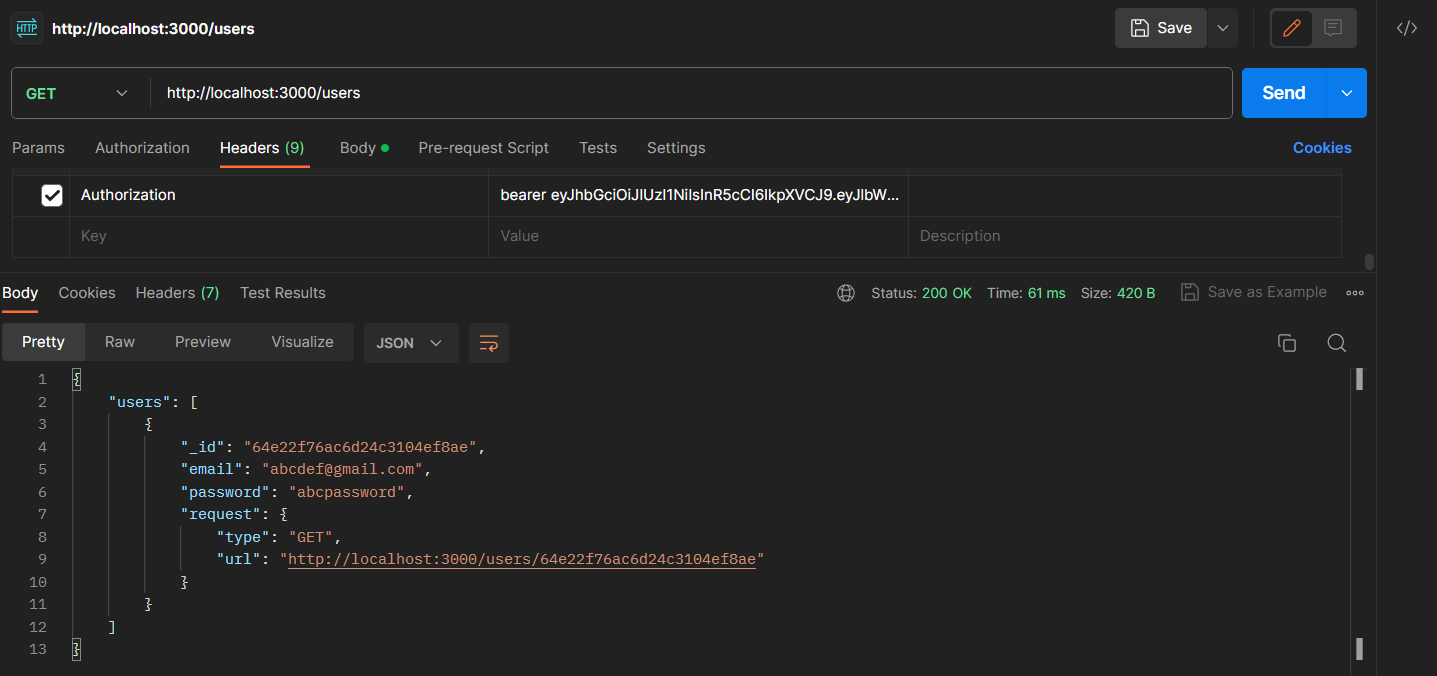
Go to Headers, set up ‘Authorization’ header and use the token in Bearer Format.
Authorization: Bearer <token>

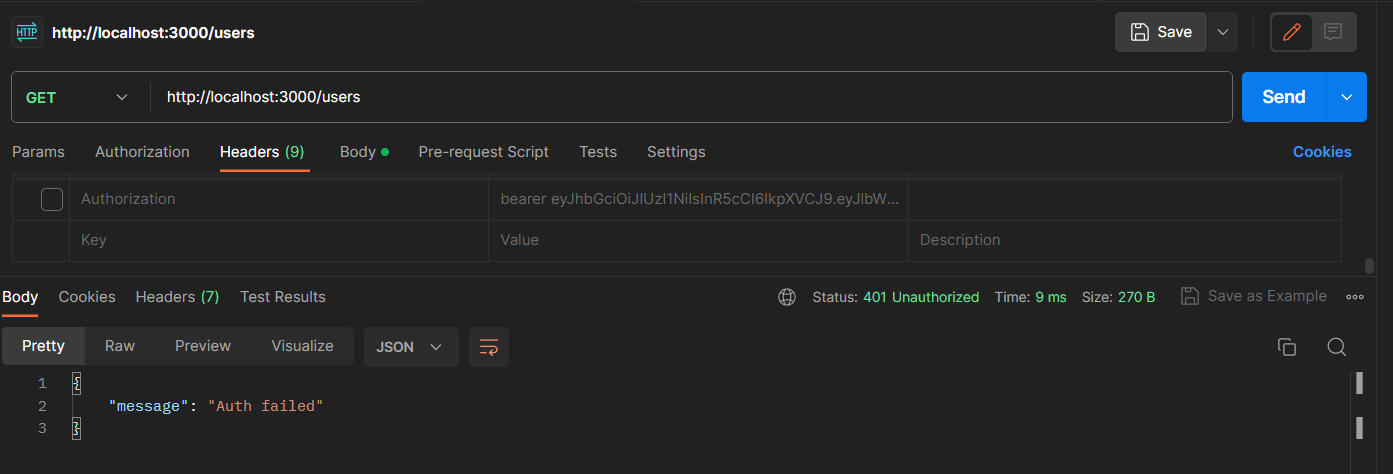
Let’s test various scenarios:
Requesting with token:

Requesting without token:

Structuring Codebase and Implementing Best Practices
Adding Authentication Middleware to Routes
Create a middleware file, e.g., ‘authenticate.js’, in your middleware directory.
Implement the ‘authenticate’ middleware in this file to verify JWT tokens.
In your route files, import the ‘authenticate’ middleware and apply it to routes that require authentication.
Exclude ‘authenticate’ from the login and signup routes to ensure they are accessible without authentication.
Creating an Environment Variable for URL
Define an environment variable, URL=localhost:3000. The value can be later changed to the URL of deployment server.
Replace occurrences of localhost:3000 in your code with process.env.URL.
Adding Route Functions to Controllers (MVC):
Create a controllers directory in your project.
Inside the controllers directory, create separate files for each route's controller, e.g., Users.js.
In each controller file, define functions that handle the logic for specific routes (e.g.,
getUsers,deleteUser).Import the controller functions in your route files and use them for corresponding routes.
This separation follows the Model-View-Controller (MVC) pattern and helps keep your code organized.
By following these steps, you'll achieve a structured and organized codebase, utilize environment variables for configuration, and ensure secure routes using authentication middleware. Customize the steps based on your application's specific requirements and coding practices.
Deploying our API with Render

Render is a cloud platform that provides hosting and deployment services for web applications, websites, and APIs. Render has a free tier plan of 500 minutes of build time per month, which is sufficient for starting.
Note: Make sure that you’ve committed your API to Github and also, sign in to Render using your Github account for streamlined deployment. Now, let’s deploy our API.
Create a Web Server under Dashboard and connect your repository. Add the following Build and Start command.

Configure Environment variables.

Create a web server and wait for it to build.
Our API is now live!

What to do next?
Test the live API using Postman for all the API Endpoints and verify if they are working as expected.
Consider implementing OTP Verification using nodemailer and password hashing using bcrypt.
Congratulations! You have successfully added authentication and deployed your API. What are your preferred areas of interest or topics you'd like to explore?
